Thursday, 24 December 2009

Seedy Joiner


I look a load of photos of this one wall from left to right just pivoting on where I was standing, not moving. The joiner I made has a wide angle effect because of this. Im not happy with the saturation and levels so I'm about to edit this further.

Tuesday, 8 December 2009

Stop Motion Plan and Research

I have decided on a subject for my animation that will relate to previous pieces that I have done. I have a general outlook on what it will look like. I hope to use photos of myself and many different items that have a personal meaning to me. This will be much like this photomontage that I have made in the past https://blogger.googleusercontent.com/img/b/R29vZ2xl/AVvXsEjt4DcPzgNCDz2jMUYs4Cok-02xPXj-elZTY7lxCjKCHF1khdTfRbpWn0XQi0M04NZT-UNebL6JBw96K_8WWvgSWq1JXEk3T9aQg59mpq2pkdlPnrI_2pqR5U4iwHcUutIWAvP6BgIvcHk2/s1600/PMontoage+copy+2+copy_600x399.shkl.jpg
The ranodm items will come out of my mouth as I ,and my background, move to look as though the camera is panning circularly around me. I have made a story board which I will scan in soon to demonstrate a more detailed picture of what I intend on creating.

Some examples:

Tuesday, 1 December 2009

Home Made Cake


I've been interested in fish eye and wide angle photography for a several years now and i have owned a lomography fisheye camera for a while now. After buying my Nikon D50 I wanted to convert it to fish eye some how as i know lenses are expensive. Ended up making one from a lens cap and a door spy hole. These are some shots of the 'lenses' and some examples.

Monday, 30 November 2009

Joiner

I created this photomontage 'joiner' using many separate photos that i took of my bedroom following my theme of 'my life as a teenager'.
This screen shot shows a few of the layers that i inserted my different images into to create the joiner.

This was fun to make but next time i'll focus more on composition.

Tuesday, 17 November 2009

Photomontage


This is my finished photomontage. I'd like to create more in the future but possibly without the use of photoshop.

These i two individual photos that i manipulated and combined to make my montage along with the photo of my face. I chose personal, small objects that create the essence of a general teenage lifestyle as well as my own specific one.

Wednesday, 4 November 2009

My Own Photomantage - Research


This amateur photo from flickr.com is iconic of a modern urban enviroment by combining the features within it. I'd like to create a montage with a similar style to this one with no strict rectanglular shape to it, more of an irregular jagged shape.

I may also try something like this with image-through-image style. I will go out and take photos of people to use for my montage that relate to my life as a 21st century teenager.


Tuesday, 3 November 2009

Stop Motion Animation

This is an animation technique that allows basic objects, or anything that may be moved, to look as if they are moving my them selves. This is done by taking a series of photos of the object and moving it slightly between shots so that when the images are played as a sequence it gives the object a smooth motion.

Examples - http://www.youtube.com/watch?v=Qv5-m9Yy9rA
- http://www.youtube.com/watch?v=z0QgGS5FK7w

Photomontage and Collage

This is the stitching of seperate photos to join and create a new image. This can be used to give the effect of objects and people in abscure enviroments; strange textures to an image or a tile/mosaic effect.
Martha Rosler - Stiches seperate real photos together to create the illusion of a new scene.
Radcliffe Baily - Creates a collage of photographs whilst using other media such as pen to transform the image further. It looks slightly like a 'mind map'.

Composition - 2nd Attempt


I used these 3 photos to create my new one beneath. After croping the section around my friend in each photo i used the 'Eraser' to get rid of any unwanted backgorund and dragged the figures in. The overlapping of the composited images was done by erasing some parts and not others.


This is the image i got. I would like to do more of these with even more sequences. And this also has relations to the new topic of 'Stop Motion Animation'.


Composition - First Attempt


I used these two images to create a new one by compositing the plane into the landscape.

Firstly i had to cut out the shape of the airplane, i did this using the 'magic wand tool' which was easy becuase of the white background it only selected the plane. I then 'copied' the selected area (Crtl +C) and 'pasted' it (Crtl + V) into the landscape image.
I played around with the size and angle of the plane before adding a motion blur to the wings and back end of the plane. I did this with a 'Blur Filter' called 'Motion Blur'. I changed the angle of the blur to match that of the planes direction.
After this i selected certain areas of the foreground of the landscape such as the boulders and tufts of grass and added a more intense motion blur to them to give the effect that the camera was moving while taking the photo.

Friday, 23 October 2009

Hi Mike

So far so good. But I would like to see some 'whole screen' examples to show us how you reached the conclusions. Keep working on independant work and have a great week off.

Mrs B

Wednesday, 21 October 2009

Changing Moods

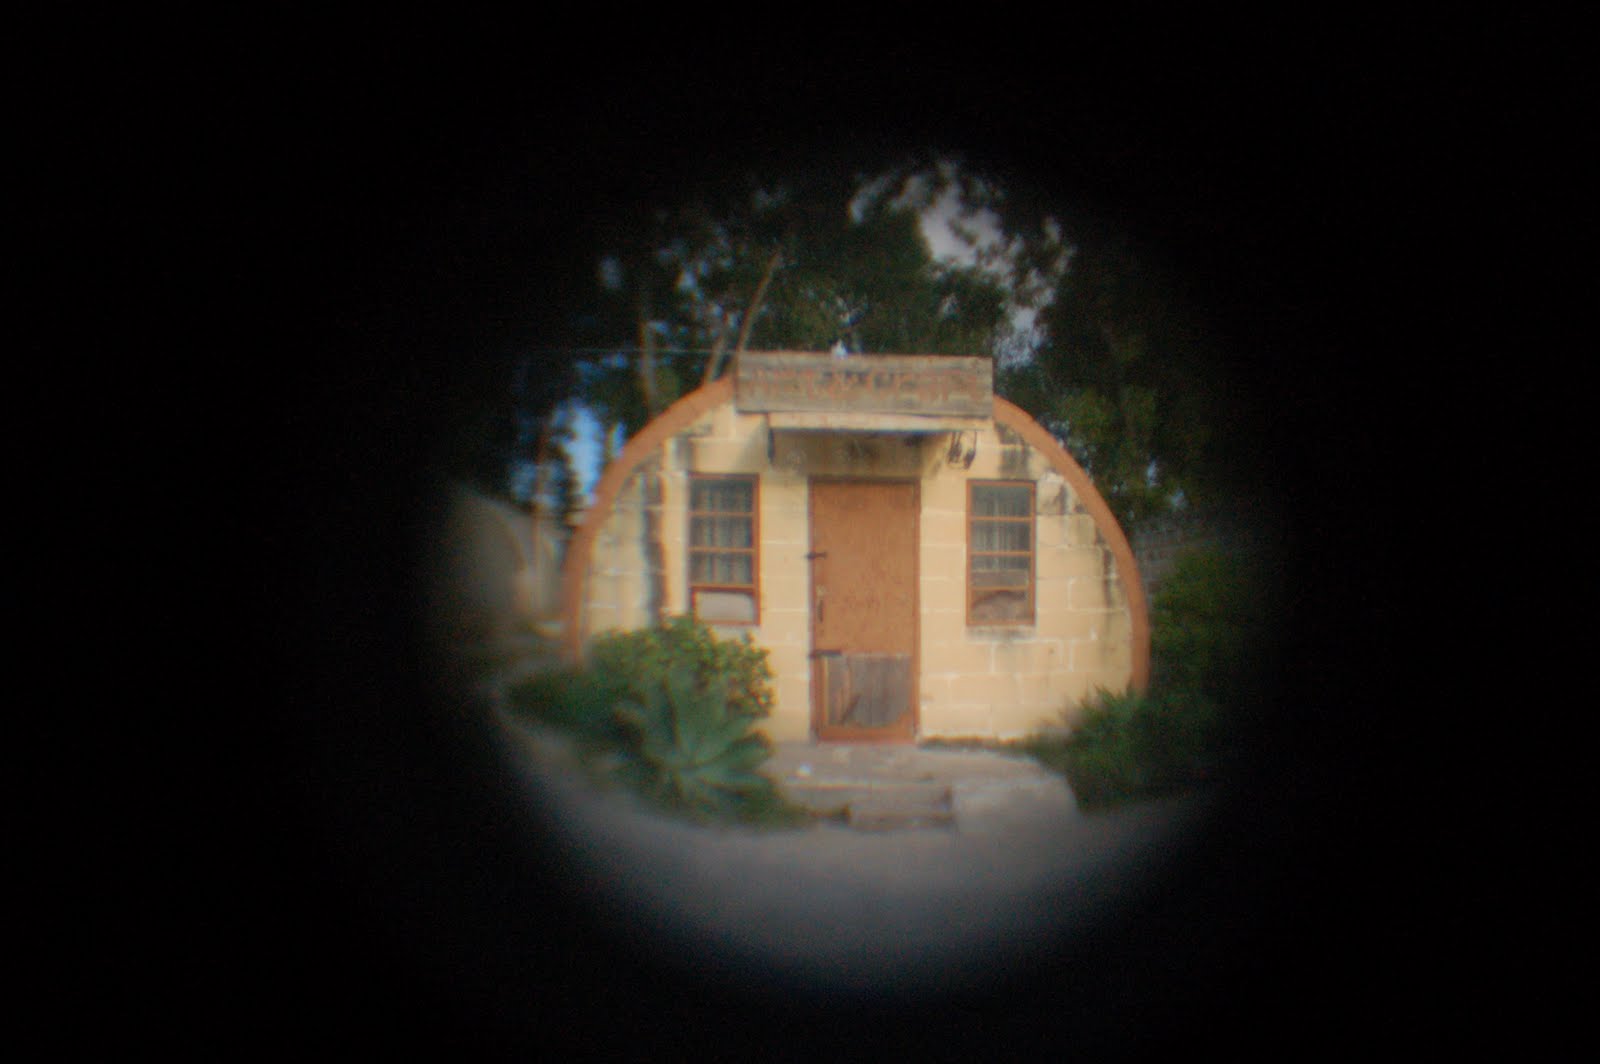
This is the photo that I decided to change the mod of. This original has a fairly positive mood due to the brightness of the photo and the blue sky and optimistic whites on the house.
Firstly I made the image black and white the image on 'Enhance' but this had no great effect on the actual mood that the image portrayed other than a neutral one.
I then 'Solarized' the image with a filter so that the image was negative. This gave me the mood that I was looking for as it now looks more intense and unfriendly. The white windows and dark sky look haunting and therefore oppose the of of the original image.

Tuesday, 13 October 2009

Warming Up Images


I wanted to use this image to practice warming up my photos, giving them a more pleasent mood.

After using the 'Spot Healing Brush' tool to remove any moles or skin imperfections I used 'Hue/Saturation' to warm up the photo. I changed the 'Hue' to -5 to make the skin tone slightly richer as well as slightly adjusting the saturation to -1. The photo now looks warmer as there is more colour to his skin. Slight things such as the colour of his lips could have been adressed while doing, i don't like how they are now pinker. By selecting all of the image except his lips they would have kept their original colour.

Thursday, 8 October 2009

Filters With Selection

I took this photo in Tunbridge Wells and thought that it would be an ideal image to change with filters becuase of the different flat panels on the building.


I selected the parts of the photo that i wanted to change with filters using both the 'Magic Wand' tool and 'Magnetic Lasso'. Once the section was selected I experimented with differnt colours made by adding and deducting filters until I was hapopy with the colour i had chosen. If i was unhappy with a colour i simply used 'Undo' (Ctrl + Z) and started again. The use of filters gives this image a Pop-Art feel which i like.

Wednesday, 30 September 2009

David LaChapelle

LaChepelle is a widely known and respected photographer who photographs abstract, colourful portraits of celebreties and models. He uses surreal locations and settings for his photos. The use of colour in his photos are part of the style of his technique.
This photo uses a varriaty of textures within colour and stronger colours to highlight certain parts of the image.

In this photo, however there is not a wide range of colours. The orange back ground helps to strengthen the content of the image. There is a great deal of tonal change in the photo that provides depth to it.


The use of colour in this image is very surreal and vibrant. the differnt clashing colours make it bold and extreme.

Digital Photograms


This is an image i took of a sunset. I think that the colours within the original image dont need much adjustment. I decided to use this image to create a digital photogram reflecting those that are made in the dark room.
I firstly need to take the colour out of the photo. I did this by completely desaturating the image and truning the Saturation of the image down to -180 on a new layer.
I wanted to slighty adjust the contrast to bring out and define some of the content. Opening 'Brightness/Contrast' I put the contrast up to +20 with this image on a new layer.
For the full effect of a photogram i need to make the image a negative. On a new layer I 'Inverted' the image on the layer bar. I like detailed trees in white as they look surreal and unusual.

Finally as i wanted to make the photo monochrome i opened 'Hue/Saturation and clicked 'Colourize' to tint the grey of the prvious negative. I adgusted the colour to a mint torquoise as i liked the colour alond side the white and black of the sun.